After upgrading my headunit to a Pioneer system last month,
http://www.toyotaownersclub.com/forums/index.php?/topic/157732-Gps-Receiver-Location?#entry1325433
I now have upgraded my Speakers with pioneer ones....The ones I fitted are recommened by pioneer to go with my headunit.
The tools needed were screwdrivers, stanley knife, crimping or soldiering tools and panel removal tool.
Oh and plenty.....

So the first thing to do is start popping off all the trim.....The tweeter grill comes off with finger pressure


These came off pretty easy with a plastic trim tool. Next you need to undo the three exposed screws..


Then you need to pop the door trim off. They are held in with these. Mine came away pretty easy again, but i do have a trim removal tool just in case.

Then i popped out the OEM tweeter and finally the door release mechanism....


And hey presto speaker is now accessible.

Next you need to drill out the three rivets holding in the woofer speaker. This is done using a 4mm drill. For those who dont know how to do this, just drill down the centre of the rivet about 2-3mm deep then pull the drill to one side and the head of the rivet will pop off.


And then youll have the speaker out of the door.....


Install the new speaker you will need an adaptor. I got mine from ebay made by connect2.


My pioneer's TS-170ci


So now to install. I screwed my adpator to the door first with sealant. Not sure if this is a waste of time or not, but i like to do it to eliminate any vibration and air flow out the sides.


I then attach the speaker wires to back of speaker and then screw that to the adaptor with sealant also....
I cut off the OEM speaker plug and wired onto the end spade plugs to fit onto speaker.

Next I attached the pioneer Tweeter to the back of the door.

And then put eveything back together in reverse order.
I now need to break in the Speakers before turning volume up to high, but off the bat these sound way better than the oem ones...
But saying that, and seeing the size of the oem Speakers, I am really suprised at the quality of sound and bass with the toyota Speakers with such a small magnet. So much so these are going straight into my wifes R reg corsa.....
One thing I would also recommend is that when you are fitting the speaker DO NOT use an electric drill/driver. Screw the speaker in by hand.
As its so easy to over tighten and split the plastic adaptor or more importantly, slip of the screw head and puncture your new speaker cone......
Now to do the other 3.
Hope this helps anyone thinking about doing a speaker upgrade.
P.s. Sorry for the small pics, not sure what happened there....
Edit: I have just finished installing rear Speakers. Went fine, just like the fronts but I have to add I thought the rears were 6.5" like the fronts but nope they are 5.1/4" dual cones..... Dual cones, good god, no wonder they sound crap.
Anyways, I ordered 2 pairs of pioneers TS-170Ci. Long story short they did fit and the door trim went back on OK, but I did have to make new fitting holes for the speaker adaptors......
Now the sound is 100% better... The bass is much more pronounced.... And less rumble/muddy sound when at high volumes.....
I was gonna install a pioneer under the seat sub woofer but I think I'll hold of for now.
EDIT:
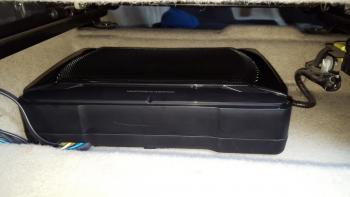
Well I think i've held of long enough........Time to install a underseat subwoofer.... 
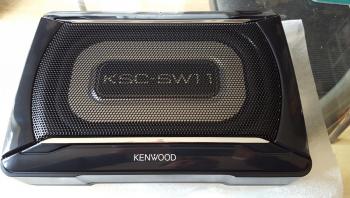
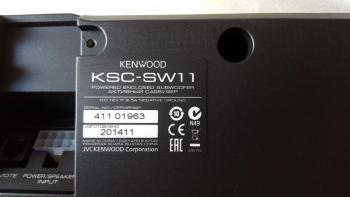
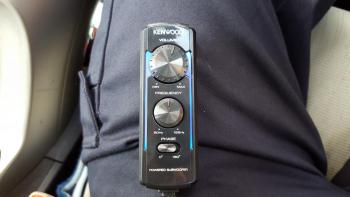
I went for the Kenwood KSC-SW11. Read loads of reviews and this one kept coming up on top for my price bracket.
So first, time to remove headunit again.
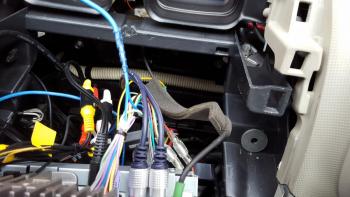
And plug in RCA Phonos and Amp remote trigger (the Blue wire).
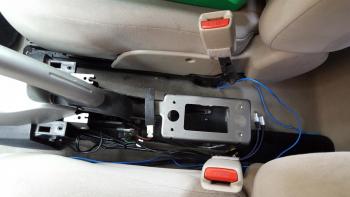
I then removed the centre console and run these two wires between seats.
Then removed glove box and lower panel. And went looking for a 12v+ feed....
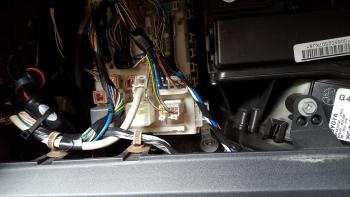
I noticed this blanking plug.
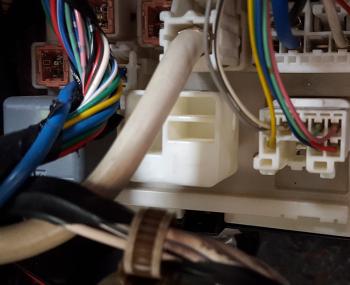
So unplugged it and noticed what looked like a socket for a relay.. Anway I tested the left prong and it was a 12v feed. But did also notice that the blanking plug was bridging the left and right prong using this.....
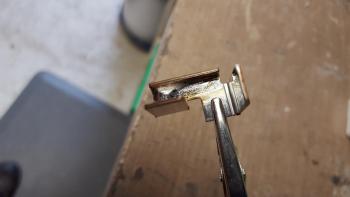
So I decided to keep this in place and just solder my amp 12v feed to it...
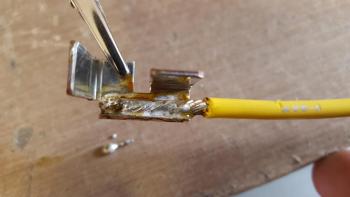
Put it back in to the blanking plug...

And pushed it back into its position on the fuse box.

I have decided to run a 12v Power lead ,and remote trigger, twice the size that is necessary for this amp because, I know that in a few months I will put another one under the other seat. So doing this means the power and trigger is already run and i have no need to disturb the front of the car again.
I now run the power wire down between seats along with the previous two.
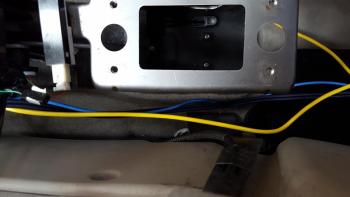
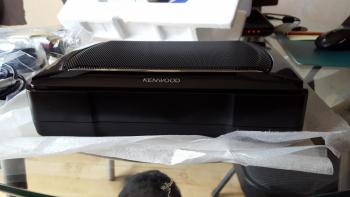
Next I placed the sub under the seat and routed the wires through the carpet to the middle od the centre console framework.

I then joined all wires together and tucked them inside the centre console framework. And screwed the earth to the frame.
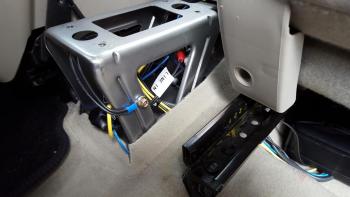
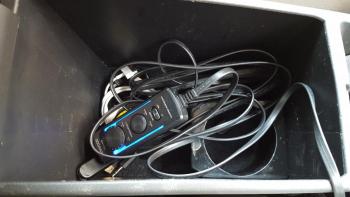
Then put it all back together. I have put the amp controller inside the armrest. Along with all the other wires from the headunit.
Until I install the second underseat amp, I have set the headunit sub controls to max and am using the amp controller to adjust and play with the bass.
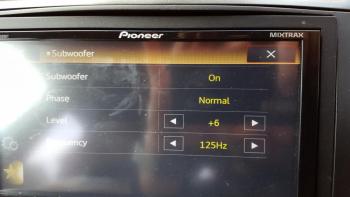
When the second amp is in, I will max out the two amp controllers, tuck and secure them under the seats, then use the headunit to control both amps. In fact a quick look at instructions shows with the controllers removed it will still produce sound with the frequency cut-off set 125Hz and phase set 0 Deg.
So right now I am in the burning in period of the amp and speaker. But even when it is set to half way there is a noticeable difference is bass.
Now I know this isn't gonna produce earth shattering bass, but it is definately adding more bass to my set up. In fact i'm suprised how much bass it kicks out for such a small unit.
It also means I can turn down the bass to the door Speakers a little, which reduces clipping or popping......
This was a fun install and I can't wait to add the second one.....
Hope this helps anyone, in anyway..... :D
